Audience
Audience acts as a mini CRM which lists all the users that have interacted with the bot. It is one of the most important aspect of the platform as it can be a vital tool in determining the overall performance of the bot and also helps in planning for growth and improvement. Some of the salient features of this section are listed here:
- Filtering : Apply multiple filters for to view list of a specific set of users and derive analytical insights from the data collected on the bot. You can export this data as excel or CSV. You can also integrate your CRM to receive data in real time.
- Segmentation : Helps you to perform bulk actions like broadcast/announce, run workflows or update user properties by creating Segments.
- User's profile : You can filter your audience and search for a particular user and checkout his/her profile.
- Bot Testing : Helps you in testing your bot as all actions happening on the bot are recorded in user's profile.
How to use filters to analyse?
Audience let's you to apply filters on the users list to better target and analyse data. You can filter a list of users by using the 'Add Filter' button, which lists all the attributes that can be used to create a filter condition as indicated in the image below in filter block.

These attributes can either be any data points collected on the platform, or any other pre defined system properties like last user message, create time, current message, last message time, current campaign and many others. You may choose as many filter conditions as you want.
How to change filter expression?
You can apply multiple filters at once to view a desired list of users. The total number of users that satisfy all the filters conditions is indicated at the bottom of the tab as shown in the above image (indicated by the arrow). In case of multiple filters, the platform allows you to modify the filter expressions to get the desired result.
For example in the above image, the filter expression is (1 and 2) as shown in filter expression block. The platform lists all the users who have shared both their email AND phone number on the bot. Total users - 424
Now using the same filters, if we want to see the list of users who have either shared their email id OR phone number, we can fulfil this by changing the filter condition to (1 or 2) in the filter expression block as shown in the below image. Total users - 713
The AND and OR are boolean operators that can also be used in complex expressions like (A and (B or C) or (C and E)).
This powerful feature helps you analyse the bot performance and take further actions for improvement and growth.

Only AND and OR operators are supported in Filter Expression
How to export/import data?
Another way to analyse the data is to export a specific list of users. The platform provides an option to Export the data collected on the bot in the form of CSV or Excel. You can build target audience by applying a combination of filters, and export the list by using the Export button in the Audience tab as shown in the below image.
Once you click on the export button, you can choose the format of the export, that can either be a CSV or an Excel.
The platform then sends out an email to your registered email address with the link to download the export.
The default export limit is 10000 records per export. There is not limit on the number of exports.
In some cases, you may need to import some data back on the platform. The platform lets you import the data using the Import button.
You can simple choose the file and map the columns with the existing properties on the platform to import data back on the platform.
Import button can be useful for bulk updates and importing data fields from brands CRM.
How to create a segment?
A segment is list of users that can be grouped together based on certain conditions. This segment entity can be used as a target audience for sending Announcements/broadcasts and Workflows. You can create create segments in Audience in the following two ways:
Dynamic Segment
The first is a dynamic segment that is derived by applying multiple filter conditions and saving the filter expression.
- You can apply filters to view a specific set of users. You can also apply multiple filters at once as shown in block (1) of above image.
- You can also modify the filter expression and change the relation between different filters as shown in the block (2)
- The platform lists all the users filtered as shown in block (3)
- You can see the total number of users that qualify the filter expression as shown in block (4)
You can click on the Save button (as shown in block (5)) to save the list of filters along with the filter expression as a Segment, which can then be used in Announce and Workflows.
All the saved segments can be revisited in the Select a segment block as indicated in block (6) of the above image. Click on the drop down indicated by the arrow, to see the list of all the saved segments. You can choose any segment to view the list fo users belonging to the group.
⭐️ mark your favourite segments to save time and effort in adding filters as your favourite segments will be listed on the Audience tab as shown in block (6), where the two segment have been star marked.
Non-dynamic Segment
As the name suggests, a non dynamic segment is a simple list of users created manually and do not change with respect to time, unless a user is added or removed explicitly.
You can create a non-dynamic segment by selecting the users profiles and save the list to create a segment by clicking in the 'Add to Segment' button as shown in the below image.
You can create a non-dynamic segment by selecting the users profiles and save the list to create a segment by clicking in the 'Add to Segment' button as shown in the below image.
- You can select the users profile by clicking on the checkbox provided on the left end of each record as shown in block (1) of the above image
- Once you have selected all the users click on the 'Add to segment' button as indicated in block (2).
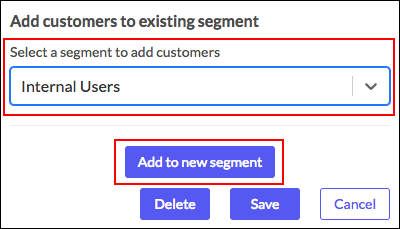
You can now add these list to any existing non-dynamic segment or create a new one as shown in the below image.
How to view user profile and test your bot?
By clicking on the user name in Audience, you can check the users conversations along with the list of details shared by the user on the bot. You can also send out human responses to the users by clicking on ‘Start Chat’ button in the users profile. Once you have replied the user you would need to assign the user back to the bot by clicking on ‘Assign to Bot’ button.
You can search for a particular user on the bot or you can apply filters to check out the desired audience list.
The user profile is divided into multiple segments. On the left you can find all the important details for the user like his phone number, email, gender Source, channel , current campaign and his activity details.
Testing your bot is one of the most important step before going live. It is important to maintain a good user experience on the bot and therefore the bot needs to be tested for all the break points and end points.
Before going live with the bot, you can create a dummy Facebook page in the Connect tab and deploy your bot on the dummy page to test the bot flow. All activities happening on the bot are tracked by the platform and these activities can be accessed in the Audience tab. The Audience tab lists all the users interacting with the bot and clicking on any user record opens that users profile and you can check out all the data points saved for that user along with the user's interaction with the bot can be viewed in his profile as shown below.
The middle section as shown in block (2) in the above image captures complete user interaction with the bot along with details of the actions triggered at the backend like conversation modules, property set , API calls and many more. This section helps us map the break points on the bot. Abnormal behaviour or deviation from intended/designed path can easily be detected and rectified.
Here are some of the scenarios that need to be tested before going live:
- Property type and validations check for each property type
- Starting rules for conversations and FAQs
- API failure conditions/reasons
- Branch conditions
- Button and Quick Response checks (N/A for WhatsApp)
- Each conversation flow should end with a CTA (Button or Quick response) for further engagement.
Related Articles
3.01 How to Follow up, Reengage and Nurture your audience - Introduction
One of the most powerful aspects of the Morph platform is nurturing/follow ups. Follow ups help us to reinitiate chat with the users and keep them engaged on the bot. How to create a segment?Before creating the follow ups you need to define the ...5.02 How to export data collected on bot as CSV and Excel
Audience tab acts as a mini CRM and lists all the users interacting with the bot. You can apply multiple filters for to view list of a specific set of users and derive analytical insights from the data collected on the bot. Another way to analyse the ...5.01 How to monitor your bot regularly - Introduction
This chapter will give you a brief of the ways by which you can monitor the activities on the bot. Now that your bot is live and running, you can keep a check on the conversations happening on the bot. Audience Tab Acts as a mini CRM which lists all ...3.04 How to create announcements/broadcast
What is Announcement? Announce is one of the best marketing tools to share content with users, engaging your subscribers and reveal their needs and interests. This feature gives you a chance to start a dialogue with your subscribers instantly. ...[Nurture] Announce
What is Announce? Announce is a tool to send messages in bulk to a segment of audience. It is a great marketing tool to share content with users, reactivating subscribers and capturing their needs and interests. You can use announce to start a ...